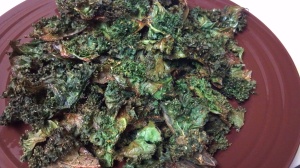
My name is Hannah, and I have an obsession with kale chips! 😉 In all seriousness, though, kale is the way to go! For months now, I have read (both on the blogs and in health and fitness magazines) about how amazing kale is. Not only is kale very low in calories and contains no cholesterol, but it also provides a significant amount of Vitamins A, C, and K, calcium, iron, and protein! I saw recipe after recipe using this leafy green vegetable, but for some reason they all scared and intimidated me. But then, I saw these on clearance at one of my local grocery stores…
…and decided to finally give them a try…and I fell in love. Since then, I have also tried several other brands, all of which I have loved. For the heads up, the Zesty Nacho flavor at Trader Joe’s is amaaazing!
So, why don’t I just stick with buying the packaged kale chips? Yes, they are convenient and oh-so tasty, but they are also quite pricey! Trader Joe’s version runs at 3.99 per bag (which contains 2 servings, but could easily be 1), and many of the other brands cost 4.99 or 5.99 per bag. Therefore, this is definitely one of those snacks that I only splurge on on occasion (which, is super difficult when you are a self-proclaimed kale chip addict!).
When I realized just how expensive this healthy obsession could get, I decided I would put in a little extra effort (not much, by the way) and make my own kale chips at home. Do not be intimidated. This is a recipe that you can easily make.
Homemade Kale Chips
Servings: approximately 2
Ingredients
1 bunch of kale
olive oil cooking spray
sea salt
nutritional yeast
cayenne pepper
dill
Directions
1. Preheat oven to 350 degrees F. Line a baking sheet with foil and spray with cooking spray.
2. Thoroughly wash the bunch of kale and let dry.
3. Cut the leaves of the kale from the stems and cut into pieces (about 2 inches wide).
4. Place the kale pieces onto the baking sheet. Lightly spray the kale with olive oil cooking spray and sprinkle with the seasonings. Do not be shy with the nutritional yeast. You will want to use quite a bit to get that cheesy taste.
5. Bake the kale chips for approximately 10 to 15 minutes, or until they have reached your desired crispness. You will need to watch them carefully, especially once you get to the 10 minute mark, to prevent burning. Remove any smaller pieces from the oven first (at around 10 minutes), so that they do not burn while the larger pieces are still cooking.
I cooked my kale chips in two batches, as the entire bunch of kale would not fit on one baking sheet.
These beauties turned out to be both crispy and flavorful. Though, next time, I would use even more nutritional yeast. Seriously, you cannot use too much! 😉 Oh, and make sure that you get creative with the seasonings that you use. Use what you love. You make think that using dill seems a bit unconventional, but it is another one of my current taste obsessions.
Ensure that you store any leftover kale chips in an air-tight container so that they preserve their crispy texture. However, the idea of having leftovers is pretty funny because you definitely will not want to stop snacking on these.
It is true. Vegetables can and do make delicious, healthy snacks. Kale chips are proof of that. Will I still buy pre-packaged kale chips from Trader Joe’s and Whole Foods? You betcha! You really cannot beat convenience. However, when I have the time, I will certainly be making my own kale chips at home. Convenience is great, but most of the time being economical is even better.


